WP_List_Table tutorial : How to display data from database to the admin block ?
WP_List_Table tutorial : How to display data from database to the admin block ?

WP_List_Table tutorial in WordPress
In this tutorial, we will learn how to create an interface displaying the data from the database to the WordPress admin dashboard.
What is the WP_List_Table?
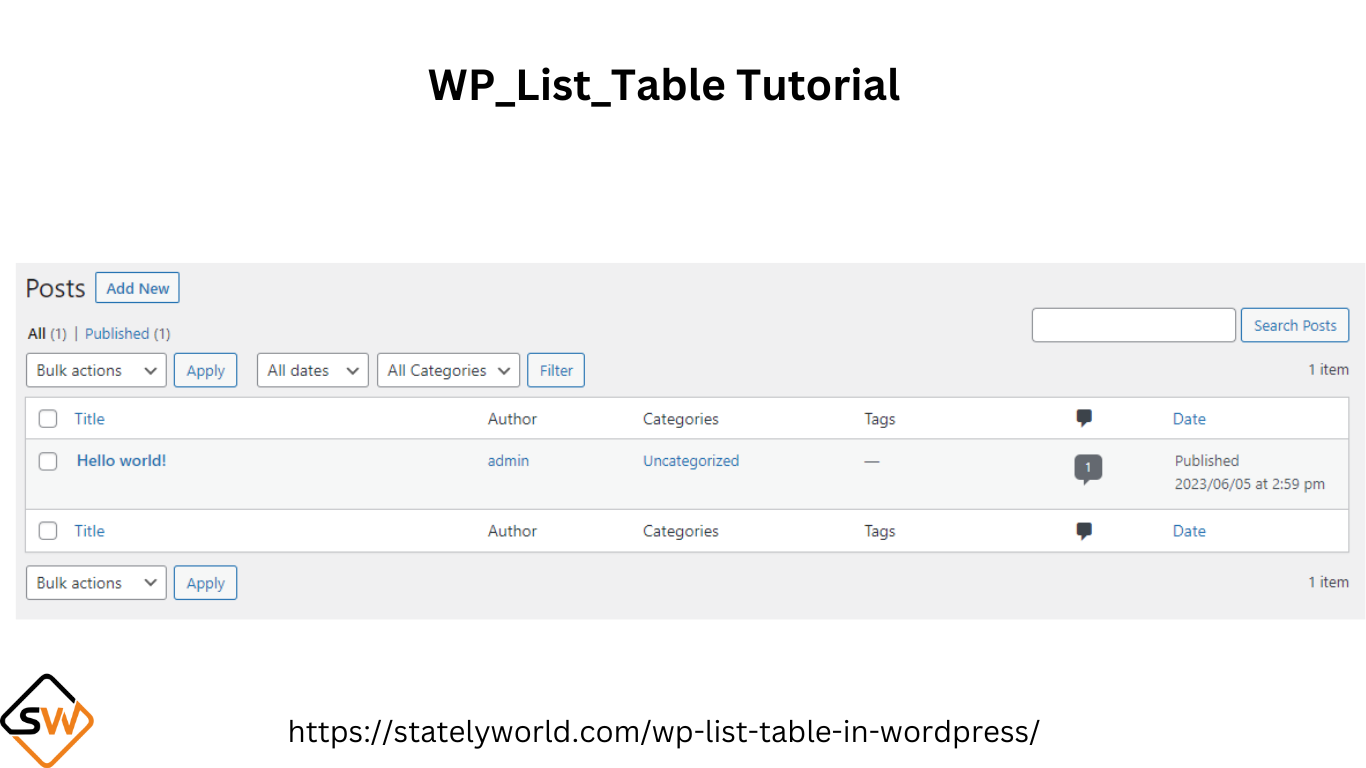
WP_List_Table is a class present in the wp-admin folder of WordPress ( inside the main folder). Every table that is displayed inside the wp-admin dashboard of WordPress uses this WP_List_Table. e.g. Posts, Users, Pages, etc.
This class allows us to display a list of content, complete with pagination, screen options, search, bulk actions, sorting, and more.
Normally, if we create a custom post type, this page is automatically created by WordPress, but how can we show administrators a page with a list taken from a custom database table?
The structure of WP_List_Table
Let’s see what items we can control with the WP_List_Table class:
- Ability to hide columns from screen options;
- Ability to decide the number of items per page from the screen options;
- Search form;
- Pagination and a lot more things.
Let’s start with the process:
- Create table
First of all, create a table whose data you have to fetch.
CREATE TABLE table_name (
    column1 datatype,
    column2 datatype,
    column3 datatype,
   ....
);
Fill in the values of your custom table.
- Insert data into the table
INSERT INTO table_name (column1, column2, column3, ...)
VALUES (value1, value2, value3, ...);
OR
INSERT INTO table_name
VALUES (value1, value2, value3, ...);
Remember: The name of the table will contain ‘wp_’ as a prefix if not then the one specified by the user.
- Create Plugin
We can start writing our WordPress plugin. Let’s go to the /wp-content/plugins folder and create the folder {your_plugin_name} and then a file inside that {same as plugin name}.php
Inside our new php file, we add this code:
<?php

/*
Plugin Name:  {Your plugin name}
Description: {Description of ur plugin}
Author: {Your name}
Author URI:
License:
License URI:
Text Domain:
Version:
*/

// Loading WP_List_Table class file
// We need to load it as it's not automatically loaded by WordPress
if (!class_exists('WP_List_Table')) {
      require_once(ABSPATH . 'wp-admin/includes/class-wp-list-table.php');
}

// Extending class
class SW extends WP_List_Table
{
    // Here we will add our code
}

// Adding menu
function my_add_menu_items()
{
      /*add_menu_page('SW List Table', 'SW List Table', 'activate_plugins', 'SW_list_table', 'SW_list_init');*/
}
add_action('admin_menu', 'my_add_menu_items');

// Plugin menu callback function
function SW_list_init()
{
      // Creating an instance
      $table = new SW();

      echo '<div class="wrap"><h2>{Title to be displayed at the top of page}</h2>';
      // Prepare table
      $table->prepare_items();
      // Display table
      $table->display();
      echo '</div>';
}
Note: Change SW according to your preferred name for your customized table.
Then, from the WordPress admin area, we will activate the plugin we just created.
Once our plugin is active and we can see a new entry in the administrator menu:
Note: If we click on the link we get an error since we don’t have any code in our {your_own_class_name} class yet.
-
Create the header of our table
The first method we are going to add to our class will be get_columns() which allows us to create the columns in our table.
// Extending class
class SW extends WP_List_Table
{
    // Define table columns
    function get_columns()
    {
        $columns = array(
                'cb'            => '<input type="checkbox" />',
                'name'          => __('name', 'SW-cookie-consent'),
                'email'         => __('email', 'SW-cookie-consent'),
                'mobile'        => __('mobile', 'SW-cookie-consent'),
        );
        return $columns;
    }
}
Note: Change the column’s name and quantity according to your table in the database.
At this point, if we visit our plugin page we can see some error. Let’s see how to fix it.
-
Connect table to data and columns
We see the error above because we have to define a prepare_items() method in our subclass in order to get it to function.
// Bind table with columns, data and all
    function prepare_items()
    {
        $columns = $this->get_columns();
        $hidden = array();
        $sortable = array();
        $this->_column_headers = array($columns, $hidden, $sortable);

        $this->items = [];
    }
Paste the above code inside the body of SW class. We will then reload the page and we can see our table, without any data in it.
-
Take data from the database
Now we need to pass an array to the prepare_items() method.
$this->items = [];
We add a method to our class to take data from the database and pass it to $this->items.
// Get table data
   private function get_table_data() {
       global $wpdb;

       $table = $wpdb->prefix . 'sw_table';

       return $wpdb->get_results(
           "SELECT * from {$table}",
           ARRAY_A
       );
   }
All we need to do is take all the data from our custom table and return it in an array.
We can modify the prepare_items() method like this:
// Bind table with columns, data and all
    function prepare_items()
    {
        //data
        $this->table_data = $this->get_table_data();

        $columns = $this->get_columns();
        $hidden = array();
        $sortable = array();
        $primary  = 'name';
        $this->_column_headers = array($columns, $hidden, $sortable, $primary);

        $this->items = $this->table_data;
    }
Note that we put our result array in a property called table_data, we will need it later. To make it work we need to define the property in our class like this:
 // define $table_data property
    private $table_data;
- Show the data in the table
The reason we still do not see the results, despite the fact that we are getting them from the database, is that we have not defined the column_default() method within our class.
function column_default($item, $column_name)
    {
          switch ($column_name) {
                case 'id':
                case 'name':
                case 'mobile':
                case 'email':
                default:
                    return $item[$column_name];
          }
    }
To display checkboxes in the table paste the following code:
function column_cb($item)
    {
        return sprintf(
                '<input type="checkbox" name="element[]" value="%s" />',
                $item['id']
        );
    }
- Ordering
By working with the WordPress admin area you probably noticed that some columns are blue and have an arrow. By clicking on the link you can sort the results.
To add sorting into your table add the following code :
protected function get_sortable_columns()
{
      $sortable_columns = array(
            'name'  => array('name', false),
            'email' => array('email', false),
            'mobile'   => array('mobile', true)
      );
      return $sortable_columns;
}
- If it is set to false (which is the default), as soon as we click on the column name the arrow will point upward and the values will be sorted in ascending order;
- If it is set to true, as soon as we click on the column name the arrow will point downward and the values will be sorted in descending order.
Remember that the second parameter (true/false) is optional and is set to false by default.
The sorting is not working since we are still missing two steps.
As a first step, we add another method that will allow us to change the sorting of the array that contains all the data in our table.
// Sorting function
    function usort_reorder($a, $b)
    {
        // If no sort, default to user_login
        $orderby = (!empty($_GET['orderby'])) ? $_GET['orderby'] : 'id';

        // If no order, default to asc
        $order = (!empty($_GET['order'])) ? $_GET['order'] : 'asc';

        // Determine sort order
        $result = strcmp($a[$orderby], $b[$orderby]);

        // Send final sort direction to usort
        return ($order === 'asc') ? $result : -$result;
    }
Now that we have added these two methods all we need to do is modify the prepared items code to make our columns in a manner that can be sorted.
Firstly, we have to edit the line:
$sortable = array();
With:
$sortable = $this->get_sortable_columns();
So that we can pass our array correctly to _column_headers two rows down.
We then add this line to reorder our array when necessary:
usort($this->table_data, array(&$this, 'usort_reorder'));
Our method then becomes the following:
// Bind table with columns, data and all
    function prepare_items()
    {
        //data
        $this->table_data = $this->get_table_data();

        $columns = $this->get_columns();
        $hidden = array();
        $sortable = $this->get_sortable_columns();
        $primary  = 'id';
        $this->_column_headers = array($columns, $hidden, $sortable, $primary);

        usort($this->table_data, array(&$this, 'usort_reorder'));

        $this->items = $this->table_data;
    }
-
Add pagination
Adding pagination is a piece of cake! All we have to do is insert a few lines of code in our prepare_items() method.
/* pagination */
        $per_page = 3;
        $current_page = $this->get_pagenum();
        $total_items = count($this->table_data);

        $this->table_data = array_slice($this->table_data, (($current_page - 1) * $per_page), $per_page);

        $this->set_pagination_args(array(
                'total_items' => $total_items, // total number of items
                'per_page'    => $per_page, // items to show on a page
                'total_pages' => ceil( $total_items / $per_page ) // use ceil to round up
        ));
Which becomes:
// Bind table with columns, data and all
    function prepare_items()
    {
        //data
        $this->table_data = $this->get_table_data();

        $columns = $this->get_columns();
        $hidden = array();
        $sortable = $this->get_sortable_columns();
        $primary  = 'name';
        $this->_column_headers = array($columns, $hidden, $sortable, $primary);

        usort($this->table_data, array(&$this, 'usort_reorder'));

        /* pagination */
        $per_page = 3;
        $current_page = $this->get_pagenum();
        $total_items = count($this->table_data);

        $this->table_data = array_slice($this->table_data, (($current_page - 1) * $per_page), $per_page);

        $this->set_pagination_args(array(
                'total_items' => $total_items, // total number of items
                'per_page'    => $per_page, // items to show on a page
                'total_pages' => ceil( $total_items / $per_page ) // use ceil to round up
        ));

        $this->items = $this->table_data;
    }
Note: the lines of code for pagination must be inserted after the function for sorting. If the sort is inserted after the array_slice function, when we sort a column the results will be sorted only for that page, the sort will not consider all the results, but only those on the screen we see.
As you may have noticed, if you enter the page number in the box manually and hit enter nothing happens. This is because our table is not a form.
To solve this we need to modify the code of our function this way:
// Plugin menu callback function
function SW_list_init()
{
      // Creating an instance
      $table = new SW();

      echo '<div class="wrap"><h2>SW Contact Form Table</h2>';
      echo '<form method="post">';
      // Prepare table
      $table->prepare_items();
      // Display table
      $table->display();
      echo '</div></form>';
}
- Screen options
To add screen options we do not have to add a method to our class, instead, we will have to modify the code on our “admin_menu” hook.
We have to delete the initial code and replace it with the following:
// Adding menu
function my_add_menu_items() {

	global $sw_sample_page;

	// add settings page
	$sw_sample_page = add_menu_page(__('SW Table', 'sw-table'), __('SW List', 'sw-table'), 'manage_options', 'sw_table', 'SW_list_init');

	add_action("load-$sw_sample_page", "sw_sample_screen_options");
}
add_action('admin_menu', 'my_add_menu_items');

// add screen options
function sw_sample_screen_options() {

	global $sw_sample_page;
        global $table;

	$screen = get_current_screen();

	// get out of here if we are not on our settings page
	if(!is_object($screen) || $screen->id != $sw_sample_page)
		return;

	$args = array(
		'label' => __('Elements per page', 'sw-table'),
		'default' => 2,
		'option' => 'elements_per_page'
	);
	add_screen_option( 'per_page', $args );

    $table = new SW();

}
In the first function, we add a hook to load screen options.
In the second function we set $table as a global variable, this way WordPress takes the list of columns and allows us to decide which columns to show or hide from the screen options.
We also add an option called elements_per_page that allows us to decide how many elements to display per page.
In fact, we have to go and modify a line in our prepare_items() method:
$per_page = 3;
Becomes:
$per_page = $this->get_items_per_page('elements_per_page', 10);
In this way, we tell WordPress to take the value ‘elements_per_page’ from the usermeta table, in fact when we change the number of elements per page, WordPress saves the value in the database. It’s the same thing with selecting the columns we want to show or hide.
The value 10 we pass as the second parameter is the default number if the user has not decided how many elements to show from the screen options. This value is optional, if we do not specify it WordPress sets it to 20 by default.
Let’s edit the line:
$hidden = array();
With this if/else statement:
$hidden = ( is_array(get_user_meta( get_current_user_id(), 'managetoplevel_page_sw_list_tablecolumnshidden', true)) ) ? get_user_meta( get_current_user_id(), 'managetoplevel_page_sw_list_tablecolumnshidden', true) : array();
This way if the user has decided to hide some columns we hide them, otherwise we pass an empty array without hiding any columns.
-
The search form
In order to search through the various elements we need a search form, and some modifications to our code to allow a search within the database.
$table->search_box('search', 'search_id');
In this way:
// Plugin menu callback function
function SW_list_init()
{
      // Creating an instance
      $table = new SW();

      echo '<div class="wrap"><h2>SW Contact Form</h2>';
      echo '<form method="post">';
      // Prepare table
      $table->prepare_items();
      // Search form
      $table->search_box('search', 'search_id');
      // Display table
      $table->display();
      echo '</div></form>';
}
Now we are going to modify our prepare_items() method to take the $_POST[‘s’] parameter and do a database lookup, like this:
if ( isset($_POST['s']) ) {
            $this->table_data = $this->get_table_data($_POST['s']);
        } else {
            $this->table_data = $this->get_table_data();
        }
So the complete method becomes:
// Bind table with columns, data and all
    function prepare_items()
    {
        //data
        if ( isset($_POST['s']) ) {
            $this->table_data = $this->get_table_data($_POST['s']);
        } else {
            $this->table_data = $this->get_table_data();
        }

        $columns = $this->get_columns();
        $hidden = ( is_array(get_user_meta( get_current_user_id(), 'managetoplevel_page_sw_list_tablecolumnshidden', true)) ) ? get_user_meta( get_current_user_id(), 'managetoplevel_page_sw_list_tablecolumnshidden', true) : array();
        $sortable = $this->get_sortable_columns();
        $primary  = 'id';
        $this->_column_headers = array($columns, $hidden, $sortable, $primary);

        usort($this->table_data, array(&$this, 'usort_reorder'));

        /* pagination */
        $per_page = $this->get_items_per_page('elements_per_page', 10);
        $current_page = $this->get_pagenum();
        $total_items = count($this->table_data);

        $this->table_data = array_slice($this->table_data, (($current_page - 1) * $per_page), $per_page);

        $this->set_pagination_args(array(
                'total_items' => $total_items, // total number of items
                'per_page'    => $per_page, // items to show on a page
                'total_pages' => ceil( $total_items / $per_page ) // use ceil to round up
        ));

        $this->items = $this->table_data;
    }
We must then modify the get_table_data() method so that it performs a database search:
// Get table data
    private function get_table_data( $search = '' ) {
        global $wpdb;

        $table = $wpdb->prefix . 'sw_custom_table';

        if ( !empty($search) ) {
            return $wpdb->get_results(
                "SELECT * from {$table} WHERE name Like '%{$search}%' OR email Like '%{$search}%' OR mobile Like '%{$search}%'",
                ARRAY_A
            );
        } else {
            return $wpdb->get_results(
                "SELECT * from {$table}",
                ARRAY_A
            );
        }
    }


